As we get this project underway, we decide to do the right wing first. Steps similar to those outlined below will be followed for the left wing after the right wing is completed.
The wing construction section will be broken into three (3) parts and web pages as follows.
- Inboard Wing Construction
- Outboard Wing Construction
- Placement Of The Wing Ribs
We begin with the inboard bottom sheeting as this is where the wing alignment can be first checked and locked in. This entails positioning two straight ribs and the flat aluminum sheeting, aligning all, and riveting them in place on the bottom of the wing. We will then move on to the top inboard curved portion of the wing which is done in a manner similar to that of the bottom.
The purpose of the inboard sheeting is primarily to align, strengthen, and support the first two ribs so that they can withstand the tension that arises in shrinking the wing fabric during the stits covering process.
 |
To make the job a little easier, we will be using a small air compressor and air rivet gun. Other tools used include a small hacksaw, tin snips, a file for finishing the leading and trailing edges of the sheeting, and a drill with 1/8-inch bit for drilling the rivet holes. A supply of Cleco fasteners were on hand along with the required Cleco pliers. |
 |
Drilling a hole in a precise spot is made much easier if a center punch is used to create a slight dimple where the hole is to be drilled. This prevents the drill bit from walking across the aluminum sheeting.
 |
This style of sawhorse was bought at Home Depot for about $10.00 each. The four sawhorses allowed me to lay the wing frame flat.
NOTE: It is very important to keep all four sawhorses level with each other as you work on the wing to keep from introducing any wing warp into the construction of the wing. |
 |
 |
You can make your own sawhorses from kits bought at building supplies like Home Depot. They sell a quick assembly hard plastic kit that you just put some 2X4 legs on and another 2X4 across the top. You will need 6, 8' 2X4's. Cut 4 of them in half (4' each) for the 8 legs. The other two can be cut to 6' and laid across the top. The kits allowed me to lay them flat or on edge. I chose to lay them flat for more surface area. A 6' top piece worked good for me since the wing is only 5' deep. |
Before we start, it would be a very good idea to learn how to identify which is the right and left wing as well as the top and bottom of the wing. The wings come marked from the factory as to which is left and right and which is front and back. However, in case the markings were removed, or whatever, here is the best way to figure it out, and is recommend to do this anyway to verify you have received two different wings. The inboard end of each wing has a 1/4" hole drilled horizontally thru it, 3/4" in from the end. The outboard end has no such holes. That will establish the root end. From the root end, go out about 2/3 the way toward the tip and find the two 1/4" holes that are drilled thru the spar for the placement of the strut brackets. The front strut bracket holes are drilled horizontally thru the spar. The rear strut bracket holes are drilled at a noticeable angle, since the rear brackets must be angled inward.
|
Here are two additional items to check. Just to be sure the frame wasn't racked in shipping, place a straightedge across the inboard, root, end of the two spars and check it's squareness to both spars. This can be done with a carpenters square. It is also a good idea to verify that the 1/4" diameter holes at the root end of the spars are in alignment and "in-plane" with the frame. With the frame alignment and orientation checked and assured, we are ready to start construction.
 |
The bare wing frame laid out on the four sawhorses as it comes from the factory in preparation to start work. We will start with the "inboard" rib sheeting and finish with the "outboard" rib sheeting for the fiberglass wing tips. First of all, rib attaching braces, or gussets, are not used for attaching the two straight ribs to the spars. The aluminum sheeting takes the place of these gussets. |
The side of the first rib should be placed exactly 1.5" from the end of the front and rear spars. You will find it much easier to hold the two ribs in place if duct tape is used to secure them while positioning the aluminum sheeting. NOTE: If you make the spacing less than 1.5" you will run into a problem trying to get the bolts in place where the spar ends fit into the Rony brackets on the root tube. You can also get into clearance problems for the aileron pushrods as well. Additionally, if you make the spacing greater than 1.5" and you are going to use the optional fiberglass wing gap cover, it won't reach out far enough to secure it to the inboard rib sheeting properly. Make that inboard rib spacing exactly 1.5" to avoid any problems. |
 |
 |
At the front spar, place the sheeting in position on the ribs. Spring clamps will hold the ribs and sheeting in position. Let the rear end of the sheeting hang over the rear spar. Then go to the rear spar and locate the ribs and sheeting and clamp them in place. Be sure the sheeting lies flat on the ribs without any tendency to warp. |
 |
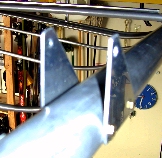
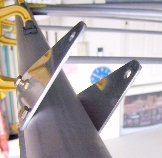
Once the hole for the center rivet has been drilled through the sheeting and spar, compress a Cleco with the Cleco pliers and insert the Cleco tip through the holes until the fastener has bottomed out on the aluminum sheeting. Then release the fastener. It should hold the sheeting firmly to the spar.
NOTE: The two photos, (above), are ones from the "outboard" wing construction, but they were used here just to show the placement of a single Cleco fastener.
Would like to mention that Cleco fasteners are not required in order to build your Challenger. However, they do make the job much easier by keeping your sheeting & ribs in place while working and during preview of what you have done before placement of the "permanent" rivets.
 |
The next two holes have been drilled and Cleco fasteners put in place. The remaining two rivets near the edge of the sheeting are a bit trickier because the rivet is to pass through the sheeting, through the end of the rib, and through the spar. Position the rib accurately and locate the hole for the rivet so that it passes through the rib properly. Drill the hole, insert a Cleco, and then do the same thing for the other rib at the other corner of the sheeting. This gives a total of five rivet holes and fasteners in the end potrion of the sheeting on the front spar. |
 |
Then, as you work across the sheeting from the front spar toward the rear spar, drill and secure the Cleco fasteners, making sure the sheeting remains flat and in place on the ribs.
 |
Once all the fasteners are all in place, work across the sheeting again, replacing the fasteners with stainless steel or aluminum rivets. Once you are finished here, you have completed the underside of the inboard sheeting. You will need to turn the wing right side up for the next step. |  |
Note: I used stainless steel rivets on those sheeted ribs. Stainless is stronger, although strength is not a concern on the inboard sheeted section. But definitely use "long" stainless rivets where you put rivets into the spars. The rest of the inboard rib sheeting can be riveted with aluminum ones if you wish
 |
Remember, do not use gussets on the ribs where you apply sheeting.
The sheeting takes the place of the gussets on those ribs.
Using the clamps, secure the sheeting to the ribs at the proper position on the front spar. Then position and secure the sheeting and ribs at the rear spar, being sure that small adjustments made at the rear does not introduce any warp into the sheeting. |
 |
Drill the holes and insert Clecos at the front spar. Then work your way back along each rib, drilling and inserting Clecos as you go. When you get to the rear spar, you will be able to mark the aluminum where it needs to be cut, lifting it up enough to use a hacksaw, tin snips, or even heavy duty scissors to cut off the excess.
 |
A "Sharpie" was used to mark the aluminum components and MEK to wipe it clean. The rivet spacing is 3". Scratches are removed with "Scotch Brite" pads. Use a small hacksaw or tin snips to remove excess sheeting material, tin snips to round the corners, and a file to finish the leading and trailing edges. |
 |
 |
Once all the rivet holes have been drilled and Cleco fasteners installed, it is recommended that you install the upright braces or "side braces" that fit between the upper and lower ribs before you rivet the sheeting in place. Here's one way to do it: Take one of the braces and snug it into place between the upper and lower ribs, being sure that it is perpendicular to the bottom rib. Mark its position and then drill the outside holes through the brace and into the outside of the ribs, installing a Cleco after each hole is drilled, top and bottom. |
 |
Then remove the top sheeting to gain access to the inside of the brace and rib. Repeat the process of drilling and installing Clecos. After everything is "just right," go ahead and install the rivets.
 |
Now, reinstall the aluminum sheeting and Cleco fasteners, if you like. You can now start replacing the fasteners with "long" stainless steel rivets in the spars and either "short" aluminum or stainless rivets for the ribs. You have just completed the fabrication of the inboard sheeted ribs. |
 |
From this point, we move on to the next section of the wing construction process, "Outboard Wing Construction." We will be working on to the outboard rib sheeting in preparation for the Hoerner Style Wing Tips.
Please return to the Featured Build Menu by clicking on your browser's "BACK BUTTON".